


How I Turned My Patchy Lawn into a Lush Green Yard
Having a patchy lawn can be frustrating. The sight of unsightly brown spots and uneven growth can make even the most pristine house look unkempt. I know this all too well, as I faced this issue last summer. My lawn, once vibrant, had started to show signs of wear and tear – uneven grass growth, bald patches, and areas that were struggling to grow anything at all. But don't worry, I found a way to turn things around, and I’m here to share my journey and tips on how to renovate a patchy lawn effectively.
Understanding the Cause of Patchy Lawns
The first thing I realized when I started researching was that there are various factors contributing to a patchy lawn. It’s essential to understand why your lawn isn’t thriving before jumping into any renovation. Common causes for patchiness include poor soil, pests, compacted ground, lack of water, or improper mowing techniques. I found out that my lawn’s patchiness was mainly due to compacted soil and inconsistent watering.
Steps to Renovate Your Patchy Lawn
After realizing the cause of my lawn’s issues, I got to work. Here are the steps I followed, which I highly recommend to anyone looking to renovate their patchy lawn:
1. Prepare the Soil
The very first thing I did was to prepare the soil. A good lawn needs healthy soil, and my compacted lawn was crying out for some attention. I started by aerating the soil. Aerating helps to improve the flow of air, water, and nutrients to the grassroots. I rented an aerator from a local garden center, which made the process much easier. If you’ve never aerated a lawn before, don’t worry – it’s simple. You just roll the aerator over your lawn, and it creates small holes in the ground.
This step was crucial because compacted soil can prevent grass from growing and lead to those stubborn patches. After aerating, I followed up with a layer of compost to enrich the soil. It added the necessary nutrients for new grass to thrive and helped retain moisture, especially during the hotter months.
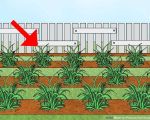
2. Reseed the Lawn
Once the soil was ready, I moved on to reseeding. I chose a grass seed blend that was suitable for my region and lawn type. This step is where I really started to see improvement. I used a broadcast spreader to evenly distribute the seeds over the bare patches and areas with sparse grass. Make sure to cover all the bare spots, but avoid over-seeding, as this can lead to overcrowded grass later on.
To maximize the seed’s chances of success, I made sure to water my lawn regularly. The goal was to keep the soil moist but not soggy. This step is critical, as the seeds need moisture to germinate and establish roots.
3. Fertilize and Mulch
As the new grass started to sprout, I applied a light layer of mulch to protect the tender shoots. Mulching not only helps retain moisture but also keeps the soil temperature consistent, providing the best environment for your seeds to grow. I used an organic mulch made from shredded leaves and straw.
Fertilizing my lawn was the next step. I used a slow-release fertilizer that would nourish the new grass without overwhelming it. Fertilizing helps to establish strong, healthy grass and is a critical part of any lawn renovation. However, it's essential not to overdo it; too much fertilizer can burn the grass.
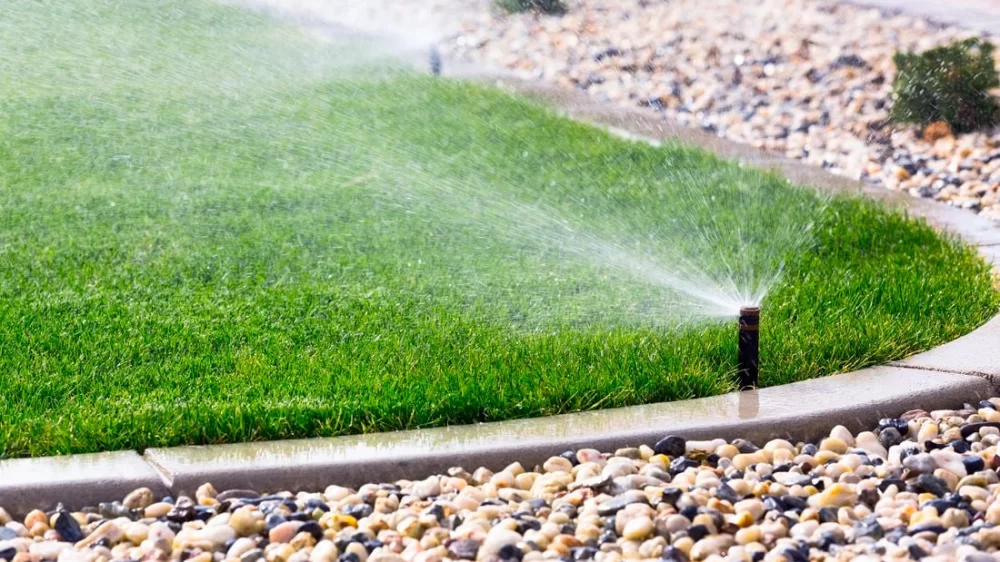
4. Regular Watering and Care
Throughout the renovation process, I made sure to water my lawn properly. Early in the morning, I watered the lawn to allow enough time for the grass to absorb the moisture before the heat of the day set in. I avoided watering in the evening, as this can lead to mold and fungus growth. Consistency is key – a patchy lawn won’t bounce back overnight, and the new grass needs ongoing care to establish a strong root system.
5. Mowing and Maintaining Your Lawn
Once my grass was growing strong, I started mowing regularly to encourage healthy growth. However, I didn’t mow it too short, as this can stress out the new grass. I made sure to keep the mower blades sharp to avoid tearing the grass and damaging it.
Proper mowing height helps your lawn stay healthy by preventing weeds from taking over and ensuring the grass blades can photosynthesize effectively. If you have tall patches, don’t mow them too short – let them grow to their recommended height before cutting.
Challenges and Patience
While the process of renovating my lawn took time, it was incredibly rewarding to see the results. However, it wasn’t without its challenges. There were moments when I felt like the patches weren’t filling in as quickly as I had hoped. But, over time, I learned to have patience. Lawn renovation is not an instant fix – it requires consistent care and attention. Eventually, my lawn began to look lush and green again, and I couldn’t have been happier with the transformation.
Conclusion
Renovating a patchy lawn isn’t as complicated as it seems, but it does require effort and patience. By following these steps – preparing the soil, reseeding, fertilizing, and maintaining proper watering and mowing habits – you can restore even the most tired lawn. Just remember, the key to success is consistency. With time, you’ll have a beautiful, healthy lawn that’s the envy of your neighborhood!