


How to Properly Edge Your Lawn
One of the best ways to make your lawn look neat, tidy, and professionally cared for is by properly edging it. I’ve learned over time that a well-edged lawn is not only about aesthetics but also about keeping the grass where it belongs, preventing it from creeping into flower beds, walkways, and driveways. Whether you're a seasoned lawn enthusiast or just getting started, edging can transform your yard from good to great. In this guide, I’ll walk you through everything I’ve learned about proper lawn edging, from the tools you'll need to the techniques that make all the difference.
1. Why Lawn Edging is Essential
When I first started taking care of my lawn, I didn't fully appreciate the importance of edging. I simply mowed the grass and called it a day. However, I soon realized that a beautifully edged lawn instantly enhances the curb appeal of a home. Not only does it create clean lines between your lawn and other surfaces like sidewalks, garden beds, and driveways, but it also helps with lawn maintenance by keeping your grass neatly contained and preventing overgrowth into unwanted areas.
1.1 The Visual Impact of Edging
One of the most obvious benefits of edging is the visual appeal. Imagine walking down the street and noticing a yard where the grass is neatly separated from the garden or the walkway. It gives a clean, well-kept look that makes your home appear more organized and cared for. After edging my own yard for the first time, I was amazed at how much more polished my lawn looked. A few hours of effort created a dramatic difference.
2. Choosing the Right Lawn Edging Tools
Before you begin edging your lawn, you’ll need to choose the right tools. Over the years, I’ve tried several different options, each offering its own advantages depending on the project at hand. Choosing the right tool will make the job easier and give you cleaner results.
2.1 Manual Edgers
Manual edgers are a classic choice for edging a lawn. These tools typically consist of a long handle with a blade at the end that you can push into the ground to create a defined edge. While they require a bit more physical effort, I’ve found that manual edgers give me a great sense of control and precision. They're perfect for small lawns or for people who prefer a more hands-on approach.
2.2 Electric and Gas-Powered Edgers
If you have a larger lawn or want to save time and energy, electric or gas-powered edgers are a great choice. These tools make the job faster and less labor-intensive. I used an electric edger for my larger yard, and it made the whole process feel like a breeze. Plus, they tend to give a more uniform and clean edge, which is especially important when you're working with harder surfaces like concrete or asphalt.
2.3 Trench Edgers and Lawn Trimmers
For those who want to add a more decorative touch to their lawn, trench edgers and lawn trimmers are great options. These tools are perfect for creating deeper, more defined edges, especially around flower beds or garden areas. They allow for a smooth transition between your lawn and other landscaping elements, giving your yard a more professional look.
3. Techniques for Properly Edging Your Lawn
Now that you’ve got the right tools, it's time to start edging your lawn. In my experience, the key to achieving great results is taking your time and following a few essential techniques. Here’s how I approach the task of edging my lawn:
3.1 Mark the Edging Line
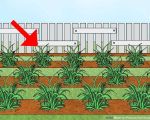
The first step is to mark the edge of your lawn. I like to use a hose or string to lay out a straight or curved line along the area I want to edge. This ensures that I have a visual guide as I work, making it easier to keep my cuts neat and uniform. If you're working with a curved line, it helps to use a garden hose to create smooth, flowing curves.
3.2 Start from the Corner or End
When I begin edging, I always start at one end or corner of the lawn. This makes it easier to work my way around the yard without missing any spots. It’s also a good idea to work in small sections, especially if you’re using a manual edger. This way, you can stay focused on each area without feeling overwhelmed.
3.3 Make Clean, Steady Cuts
As you begin to edge, make sure to keep your cuts steady and clean. Whether you’re using a manual tool or a power edger, try to maintain an even pressure on the tool to avoid jagged lines. A little patience here will go a long way in ensuring that your edges look sharp and neat.
3.4 Maintain the Right Depth
It’s also important to maintain the right depth when edging. In my experience, edging too deep can damage the lawn and lead to uneven growth, while too shallow a cut can leave the edges looking rough. I aim for about 2 to 3 inches deep, depending on the area. This depth helps define the lawn without cutting too deeply into the grass.
4. Aftercare: Keeping Your Edges Clean
Once you’ve finished edging your lawn, the work isn’t quite done. Maintaining the edges is just as important as the initial cut. I like to go over the edges every couple of weeks to make sure the grass hasn’t started creeping back into the flower beds or sidewalks. You can use a string trimmer or a weed eater to clean up any grass that grows over the edge.
4.1 Mulching or Using Edging Materials
One trick I’ve learned is to add mulch or use edging materials like bricks or plastic borders to keep the edges intact longer. These materials not only help keep grass from growing over the edge but also give the yard a more defined and polished look. If you’re looking for a more permanent solution, these materials are a great way to go.
4.2 Regular Lawn Maintenance
Regular lawn maintenance, including mowing and watering, is essential to keep the edges looking crisp. By maintaining a consistent routine, you’ll help the grass grow evenly and prevent any overgrowth along the edges. I’ve found that consistent care helps make edging easier in the long run.